Tuesday, June 3, 2025

Hexie Pillow - Palette Teal by Tim Holtz

Hello friends! I'm so excited to share this Hexie Pillow with you all using the Tim Holtz Palette in Teal. I've had my eye on this pattern for a while and the teal fabric is perfect for it. This pattern by Modern Handcraft and Fat Quarter friendly, you will just need one yard of fabric for the pillow portion. The Palette Teal fabrics are so pretty with deep dark colors to soft beautiful images. The Teal Butterflies fabric is my favorite. 


Don't you just love the quilting on this? 

Palette Teal is available in online and in stores now! 

Great pattern, easy to follow instructions and there are a few videos as well.

The Hexes are made with the English Paper Piecing techniques. 
I basted all my hexes to the papers by hand. It was much quicker then I anticipated. 

Once the hexes were all basted I laid them out to see how it was going to look. 
I adhered all the hexes as instructed and let dry. Waiting for everything to dry was the hard part.

I layered the pieces together with batting in the middle for quilting. 
I like to use spray base as its quick and easy. 

I marked my lines with a air disappearing pen and then started quilting. Be sure to test your marking method to make sure it works properly. 

I love how all the lines go through the block and create a little star pattern. 

I can't wait to make another project with the Palette Teal Fabrics. 
Thanks so much for stopping by!
Richele 

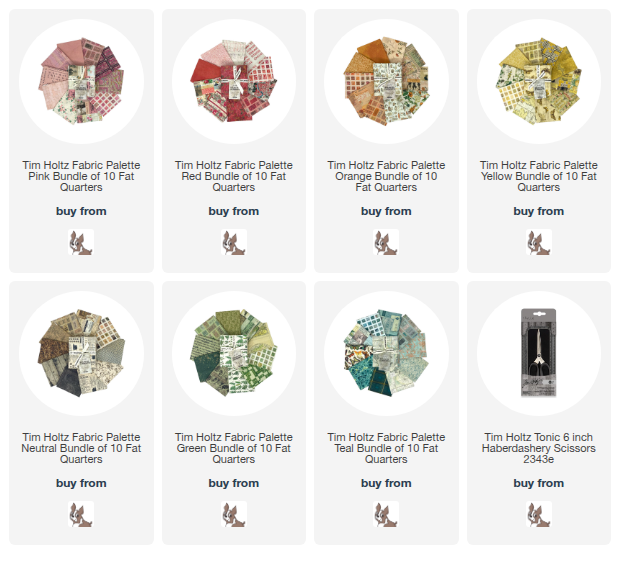
Simon Says Stamp has all the fabrics! 

Friday, May 30, 2025

Coloring with Distress Products - Tim Holtz - Ranger Ink

 Hello friends! I've been thinking about coloring with all the different Tim Holtz Distress products and how they look different. So I decided to do some experimenting and find out the differences of the products. After a few tests I realize my favorite way to color is not really my favorite. Let's get started. I stamped the same flower on to Distress Watercolor Cardstock and I also used the same colors and technique when coloring. This will be the truest test. 

Distress Products used....
Distress Watercolor Pencils
Distress Ink
Distress Oxide Ink
Distress Crayons
Distress Reinkers
Distress Spray Stain
Distress Oxide Sprays

Colors used.....
Picket Raspberry
Fossilized Amber
Mustard Seed
Mowed Lawn
Rustic Wilderness
Vintage Photo

Stamp your image with a waterproof ink like Archival Ink in Black Soot.
This Stamp set is CMS487 and it has several flowers that could be used. 

Distress Watercolor Pencils 
These have been a favorite since they came out. They are easy to use and give great results. I colored the image with the pencils and then blended with a waterbursh. Dry with a heat tool and then add more color where desired. I also splattered colors in the background for fun.
Findings - Easy to use and the results are great. They are a little chalky.

Distress Ink Pads
I applied the Inks to my Glass Mat and the picked up the color with the waterbrush. 
Findings - The color is not as strong as I like but it works well. 
You could add more layers for more intense color.

Distress Oxide Ink Pads
Apply the inks to your Glass Mat and pick them up with a waterbrush. Color as desired.
Findings - The Oxides are a softer look and covers the stamped image a little. 

Distress Crayons
Color the Crayons on to the Glass Mat and pick color up with the Waterbrush and color as desired.
Findings - I like the look of this and the color is vibrant. 

Distress Reinkers
Add 1-2 drops of reinkers to the Glass Mat and color with a Waterbrush as desired. 
I think this was my favorite!
Findings - The color is very vibrant and doesn't effect the stamped image. 


Distress Spray Stains
Take the dropper out of the bottle and tap a few drops on to the Glass Mat pick up color with the Waterbrush. Color as desired. 
Findings - Although the color is vibrant it a little watery and had a tendency to spread out side the stamped lines. Drying more often will help with this.  

Distress Oxide Sprays
Take dropper out of the bottle and tap a few drops on to the Glass Mat, pick up color with the Waterbrush. Color as desired. 
Findings - The color is very chalky and covers the stamped image. you could go back and stamp the image again over the coloring. I do like the softness of the color. 

Here is a closer look. Some of the changes are very subtle but it's great information. I'm going to put them on a ring and keep them handy to reference the next time I color images. 

I hope you find the information helpful, I know I do! 

Thanks for stopping by! 
Richele 

Products I used from Simon Says Stamp

Wednesday, May 28, 2025

Trivets and Coasters with Palette by Tim Holtz

Hello friends! Trivets and Coasters oh my! This is always a fun and quick project yo can also use this method to make bowls. The Palette Fabrics by Tim Holtz are perfect. I made one of each color so everyone can have their own color. So FUN right. The Trivets can be used for hot plates or even under a plant as a coaster. Fat Quarter Bundles will work for this project, you just need to tear a few strips off. 

Gather your supplies.
Palette Fabrics
Cording 3/16th" (Home Depot)
Sewing Machine (zigzag stitch)
Thread
Scissors

Tear strips of fabric about 1/2" - 3/4" wide. You can also cut them if you would like a more finished look. I like to tear my strips for a more rustic look. 

Cut the end of your cording at an angle. Wrap the fabric around the cording making sure the fabric is not loose. Use a clip at the end to hold the fabric while you work adding more fabric as you go. 

Coil the end as tight as you can and zigzag across the center to secure. 

Continue wrapping the fabrics, coiling the wrapped cord and zig zagging as the coil gets larger and larger. 

I line up the center of the pressure foot so the stitches catch on both sides. 

When your coaster or trivet is the size you like cut the cord at an angle and wrap the fabric over the cut end. 

If you're working on a trivet you may have to angle the piece to continue sewing. This machine has a small throat but it worked fine angling it. 

Sew all the way to the end to secure the end of the cording. I use a stiletto to hold the end in place. You may need to sew this section a few times to secure well. Once your done sewing you may need to press the trivet to reshape it flat. Spray with a little water or use steam to help. 


I had so much fun creating these and they will be so useful. The Coasters and Trivets are a beginner project do don't be afraid to try them. 
How many Coasters will you make?

Thanks so much for stopping by!
Richele 

Head over to Simon Says to get your fabric! 

Tuesday, May 20, 2025

Garden Apron with Palette GREEN and YELLOW by Tim Holtz

Hello friends! I made the cutest apron for working in the Garden, maybe the kitchen or anything really. The apron has lots of pockets to hold your tools, seed packets, scissors and maybe even some treasures. Palette Green and Yellow were the perfect fabrics for this project. I chose the Green Vintage for its dark rich color to showcase the YELLOW and GREEN botanical Palette fabrics. You will love these fabrics! If you haven't seen the Palette collection you're missing out. You can see the whole collection on the Tim Holtz YouTube Chanel. Each month there is a new color and this month is GREEN and you'll have to comeback next month to see my projects with Palette TEAL, it's beautiful! 

Pattern: Utility Waist Apron by 204Fabricnstuff 

The pattern was straight forward and easy to follow.
I wanted the layers (pockets) of my apron to be a little thicker so I cut 2-fabric pieces and 1-lightweight woven fusible interfacing. Iron the fusible interfacing to one of the pieces.

 
Sew around the pocket layers together leaving the top open. 
clip corners, turn right side out and press.

After turning add wide binding to the top. Topstitch 1/8" from edge. 

Position pockets as instructed to the base apron. Top stitch 1/8" from the edge and then again 1/4" from the edge. Sew both pockets on.  

Create the upper side pocket and pin in place lining up to the top edge. 
This pocket will be great for scissor or clippers. 

Sew ties and waistband together and then sew to top of the apron. 

Topstitch 1/8" from the edges of the ties and waistband. 

I can't wait to use my new apron in the garden. It's going to be perfect. 

Thanks for stopping by!
Richele

See the full collection of Palette GREEN fabrics below! 

Monday, May 12, 2025

Zip it Up 2.0 in Palette Green by Tim Holtz

 Hello friends! I'm excited to be a guest over on the Simon Says Stamp Blog. Palette Green by Tim Holtz was perfect for my project with the Tickets, Vintage, Map and Typography as the star of the show. This great organizer "Zip it Up 2.0" byAnnie.com was a fun project to make.

Don't you just love these fabrics together. As you know I'm very fond of the Ticket fabrics in all the colors. The Typography and the Dark Green Vintage look amazing with the Tickets don't you think?

See how perfect this is for ephemera. I cant wait to take it to my next crop! 
Click here to go the the blog post with all the details. 


What will you make with Palette Green by Tim Holtz? 

Thank for stopping by! 
and don't forget to check to the Simon Says Stamp blog. 

Richele

See all the GREEN Palette fabrics below. 

Tuesday, May 6, 2025

Meet the Altoona Tote in Palette Green by Tim Holtz

Hello friends! I've been spending my days sewing and being outside enjoying the nice weather in Northern California. I'm not ready for the hot weather just yet. Anyway....I bought a new pattern for the Altoona Tote and have fallen in love with it. The Palette Green by Tim Holtz was the perfect fabric as you see below the outside of the tote is Green Collage and Green Vintage and the inside is Green Tickets and Green FernsPalette fabric. Stay tune I have lots of fun projects that I know you're going to LOVE! 

Palette GREEN by Tim Holtz has never looked so good. 

Palette GREEN is oh so beautiful with deep dark colors, the world map, stamps, tiny print, tickets (a huge favorite of mine), typography, even some gorgeous fern leaves. There is definitely something for everyone. The possibilities are endless. 

I gathered my fabric and the NEW Altoona Tote pattern by Ma Tante Quilting! 
The pattern comes in 3 sizes (I made the medium) and is beginner friendly. Shelly has some YouTube videos to help you along the way. 

To start I quilted all my layers together. 

I sewed the handles on and added some pockets.

Cut the corners out, sew the side seams and covered the side seam with binding. 

Here I've clipped the boxed corner, then sewed it and added binding binding to cover the raw edges.

Turn the bag right side out and add the binding to the top edge to cover the raw edge. and you're done! It actually came together pretty quick. 


I used a 1" crosshatch to quilt the layers together. 

I love to have pockets so I added one on the outside and one on the inside. 
(Pockets are not part of the pattern.) 

The Green Collage Palette fabric is the perfect look for my Tote. No patchwork required but that could be fun too. 

Thanks for stopping by! 
Richele

See all the Green Palette by Tim Holtz below!